
Rebuilding in more ways than one
- Nov 8, 2025
- 4 min read
Today I made an adorable little Christmas village, and I thoroughly enjoyed it, a small project that I just played around with and made up as I went along. It might not sound like much, but for me, it was a really special moment. It’s been such a long time since I’ve felt that spark of joy and spontaneous creativity again.
Life changed completely over 5 years ago when I lost my husband, Richard. For a long time afterwards I lost myself too. All the confidence, the want, the spark it had been wrenched away from me.
Looking back now, I can see that so much of what I did, or didn’t do, came from that place. The truth is, grief is a process you can’t skip or sidestep. You just have to go through it, every lonely, painful, confusing part of it. No one can really walk that path for you, it’s something you face on your own. But in doing that, you discover something important, that you can get through it. From that knowing, a quiet kind of strength begins to build inside you. I was changed by it all.... completely but I have learned to let those changes, good and not so good, reshape me and from my new foundations build a more fulfilled life.
One of the biggest signs of my regaining strength has been renovating my home and building my studio, something that, for years, I just couldn’t face. Our new home and studio space was a dream Richard and I had together, and when he died, I couldn’t bring myself to finish it. They stood still, quietly crumbling, a reflection of how I felt inside.
Last year I returned to our home, it was empty, cold and sadly neglected …. I started slowly but surely to rebuild, one last bit sticking out like a sore thumb was the studio, I just couldn't face finishing it But this year something changed. I felt ready to pick up where I left off. I battened the walls, plaster boarded, insulated, filled, sanded, and painted , all by myself. It became a project of determination, and now it’s a bright, colourful, welcoming space that feels like me. I am so proud of myself and I know that Richard would be too. I feel like a champion prize fighter!
This must seem like a very heavy topic to Segway into the mini Christmas Village , but from the leftover bits of wood from the studio rebuild came something small but special: my mini Christmas village, a cheerful little scene that reminds me that even from scraps, something beautiful can grow.
Making My Mini Christmas Village
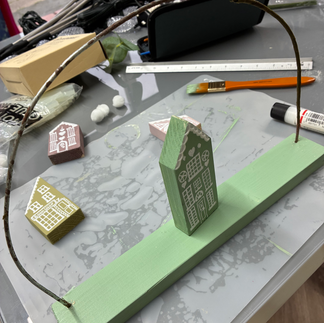
I had some leftover 2” x 1” timber from the studio rebuild, and I’d recently bought myself a mitre saw , not a dainty little tool, but a proper full-sized, powerful one! I bought it for renovating the house, and I have to say, I absolutely love it and now its come in handy for creative projects too. I used it to cut the timber into different lengths, giving each one a slightly different roof shape so they looked varied when lined up together.


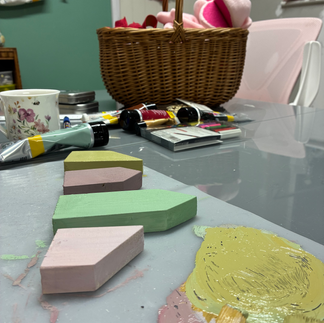

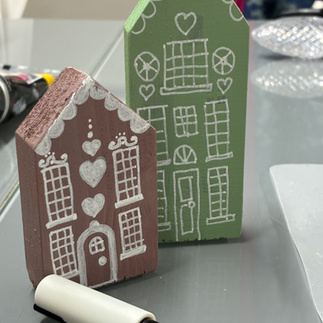
I mixed up some muted paint shades for the base coats, soft, natural tones that suited the calm, wintery feel I had in mind. When it came to adding the little details of the doors, windows and rooftops I decided to just go for it.
I’m not an artist, and I don’t have much confidence with drawing, so instead of overthinking or trying to make them perfect, I just picked up my paint pen and started. I didn’t worry about straight lines or symmetry I just played and do you know what, I love it! A reminder that creativity doesn’t have to be perfect to be ace.
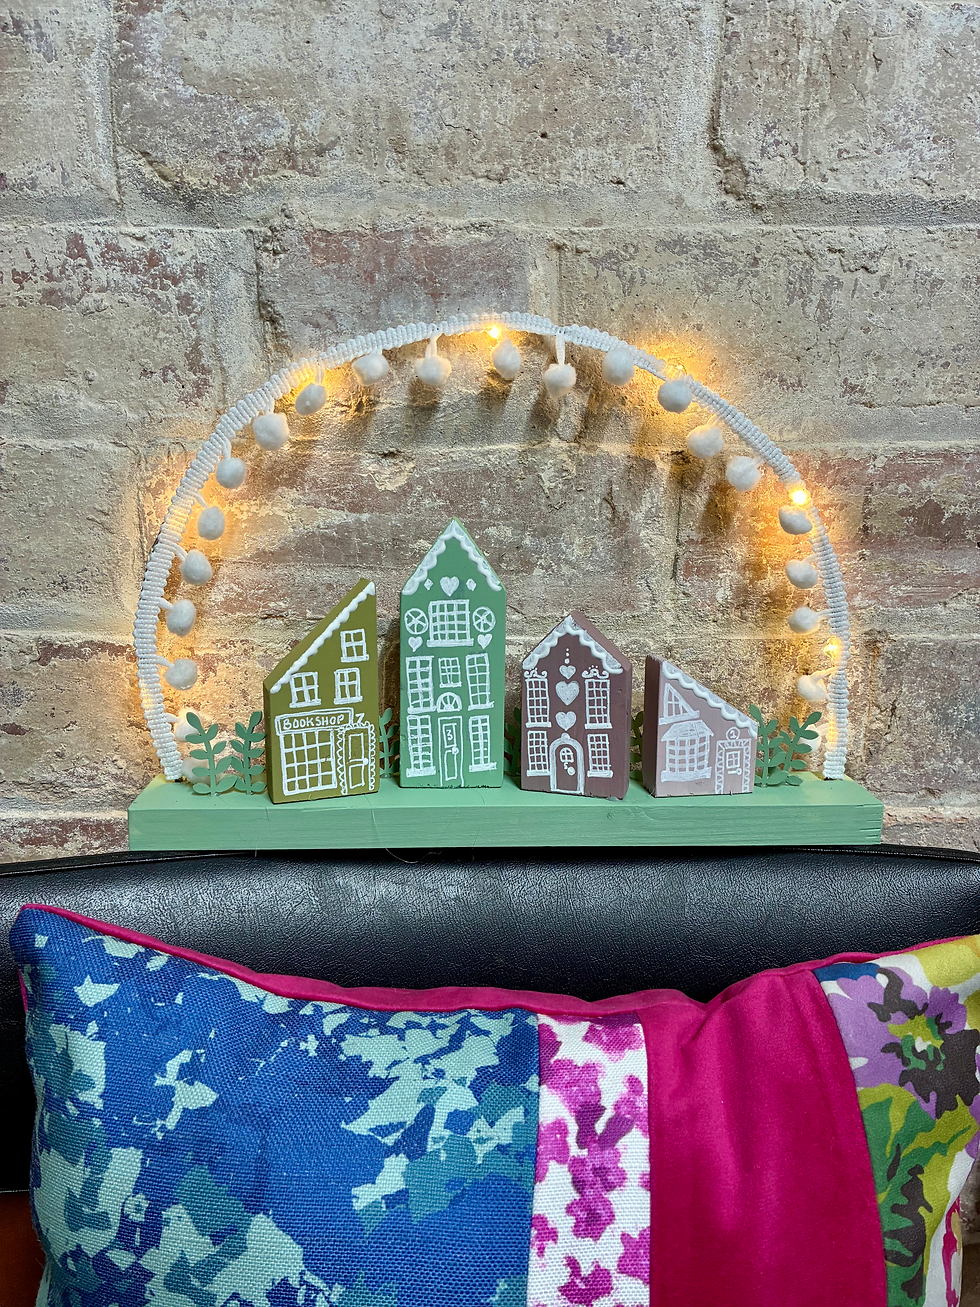
Once they were all painted, I tried out a few layouts before deciding to mount the houses on a piece of 2” x 1” timber as a plinth to give them a lovely, finished look. When everything was painted and glued down, it still felt like something was missing. Then I remembered my little wired LED fairy lights , the ones I usually use for wreaths and thought a bit of sparkle would bring it all to life. I just didn’t want the wires showing. That’s when I spotted some pom-pom fringe tucked away in my cupboard. It looked so cute, like tiny snowballs, and I suddenly knew exactly what to do!

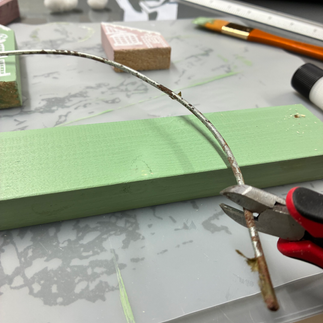


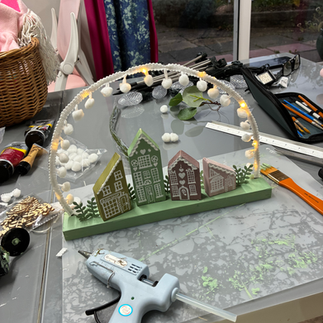
I bent a piece of wire into an arch, wrapped the LED lights around it, and fixed them with a bit of hot glue. Then I cut a strip of pom-pom trim and glued it over the top, hiding the lights and turning it into a little snowy arch. I drilled two tiny holes in the plinth, popped the ends of the arch in, and added a few painted wooden foliage shapes around the base.
Hey presto! a glowing, cute little festive village scene, built from leftovers, determination, and imagination.
Materials & Tools
Materials
Offcuts of 2” x 1” timber (for the houses and plinth)
Acrylic paint for base colours (I used muted tones I mixed myself)
White paint pen or fine brush for details
Pom-pom trim or fringe
Mini wired LED lights
Short piece of bendable wire (for the arch)
Small laser-cut wooden foliage shapes (optional)
Hot glue sticks
Tools
Mitre saw (or hand saw if you prefer)
Drill and small drill bit (for two small holes in the plinth)
Paintbrushes
Hot glue gun
Sandpaper
Tip: Don’t worry about getting things perfect, just have fun and see what happens. Each little house will have its own personality, and that’s what makes the scene special.
You are an inspiration Josie ✨️ ❤️